Designing a kitchen on a budget (Part 2 of 2)

In my last post I shared some of the process I went through with a client to completely gut out and renovate her apartment kitchen. In case you missed that post click here so you’re up to speed!
In this post I’ll focus on the issues with the original kitchen, how we resolved them through the new design and share beautiful transformation photos. I'll also share the paints, finishes and appliances we used below. Join in because this will be a fun one!
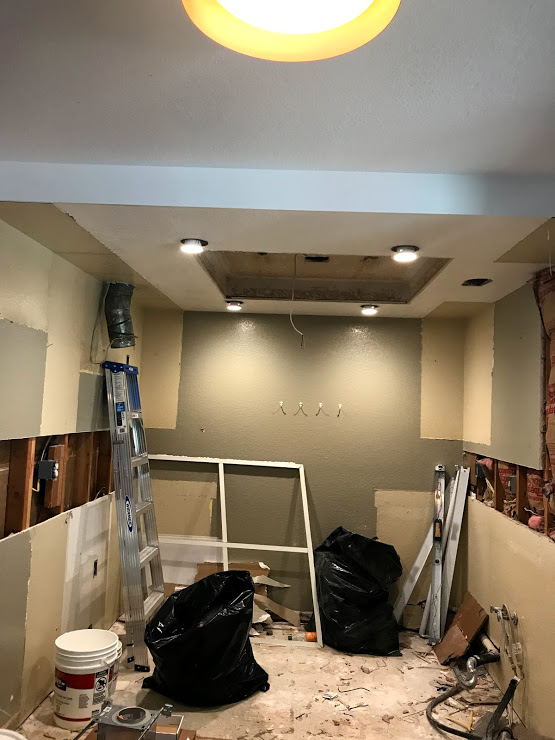
Old Layout
First thing’s first, let’s talk about the old kitchen layout and the obvious problems with it. This apartment has an open plan where the kitchen and dining are adjacent to each other and there’s one entry leading to both spaces (through the living room).
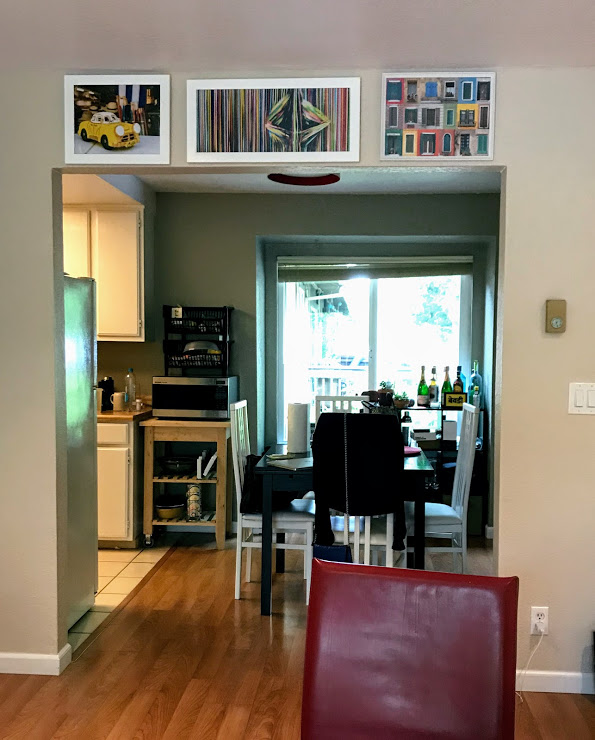
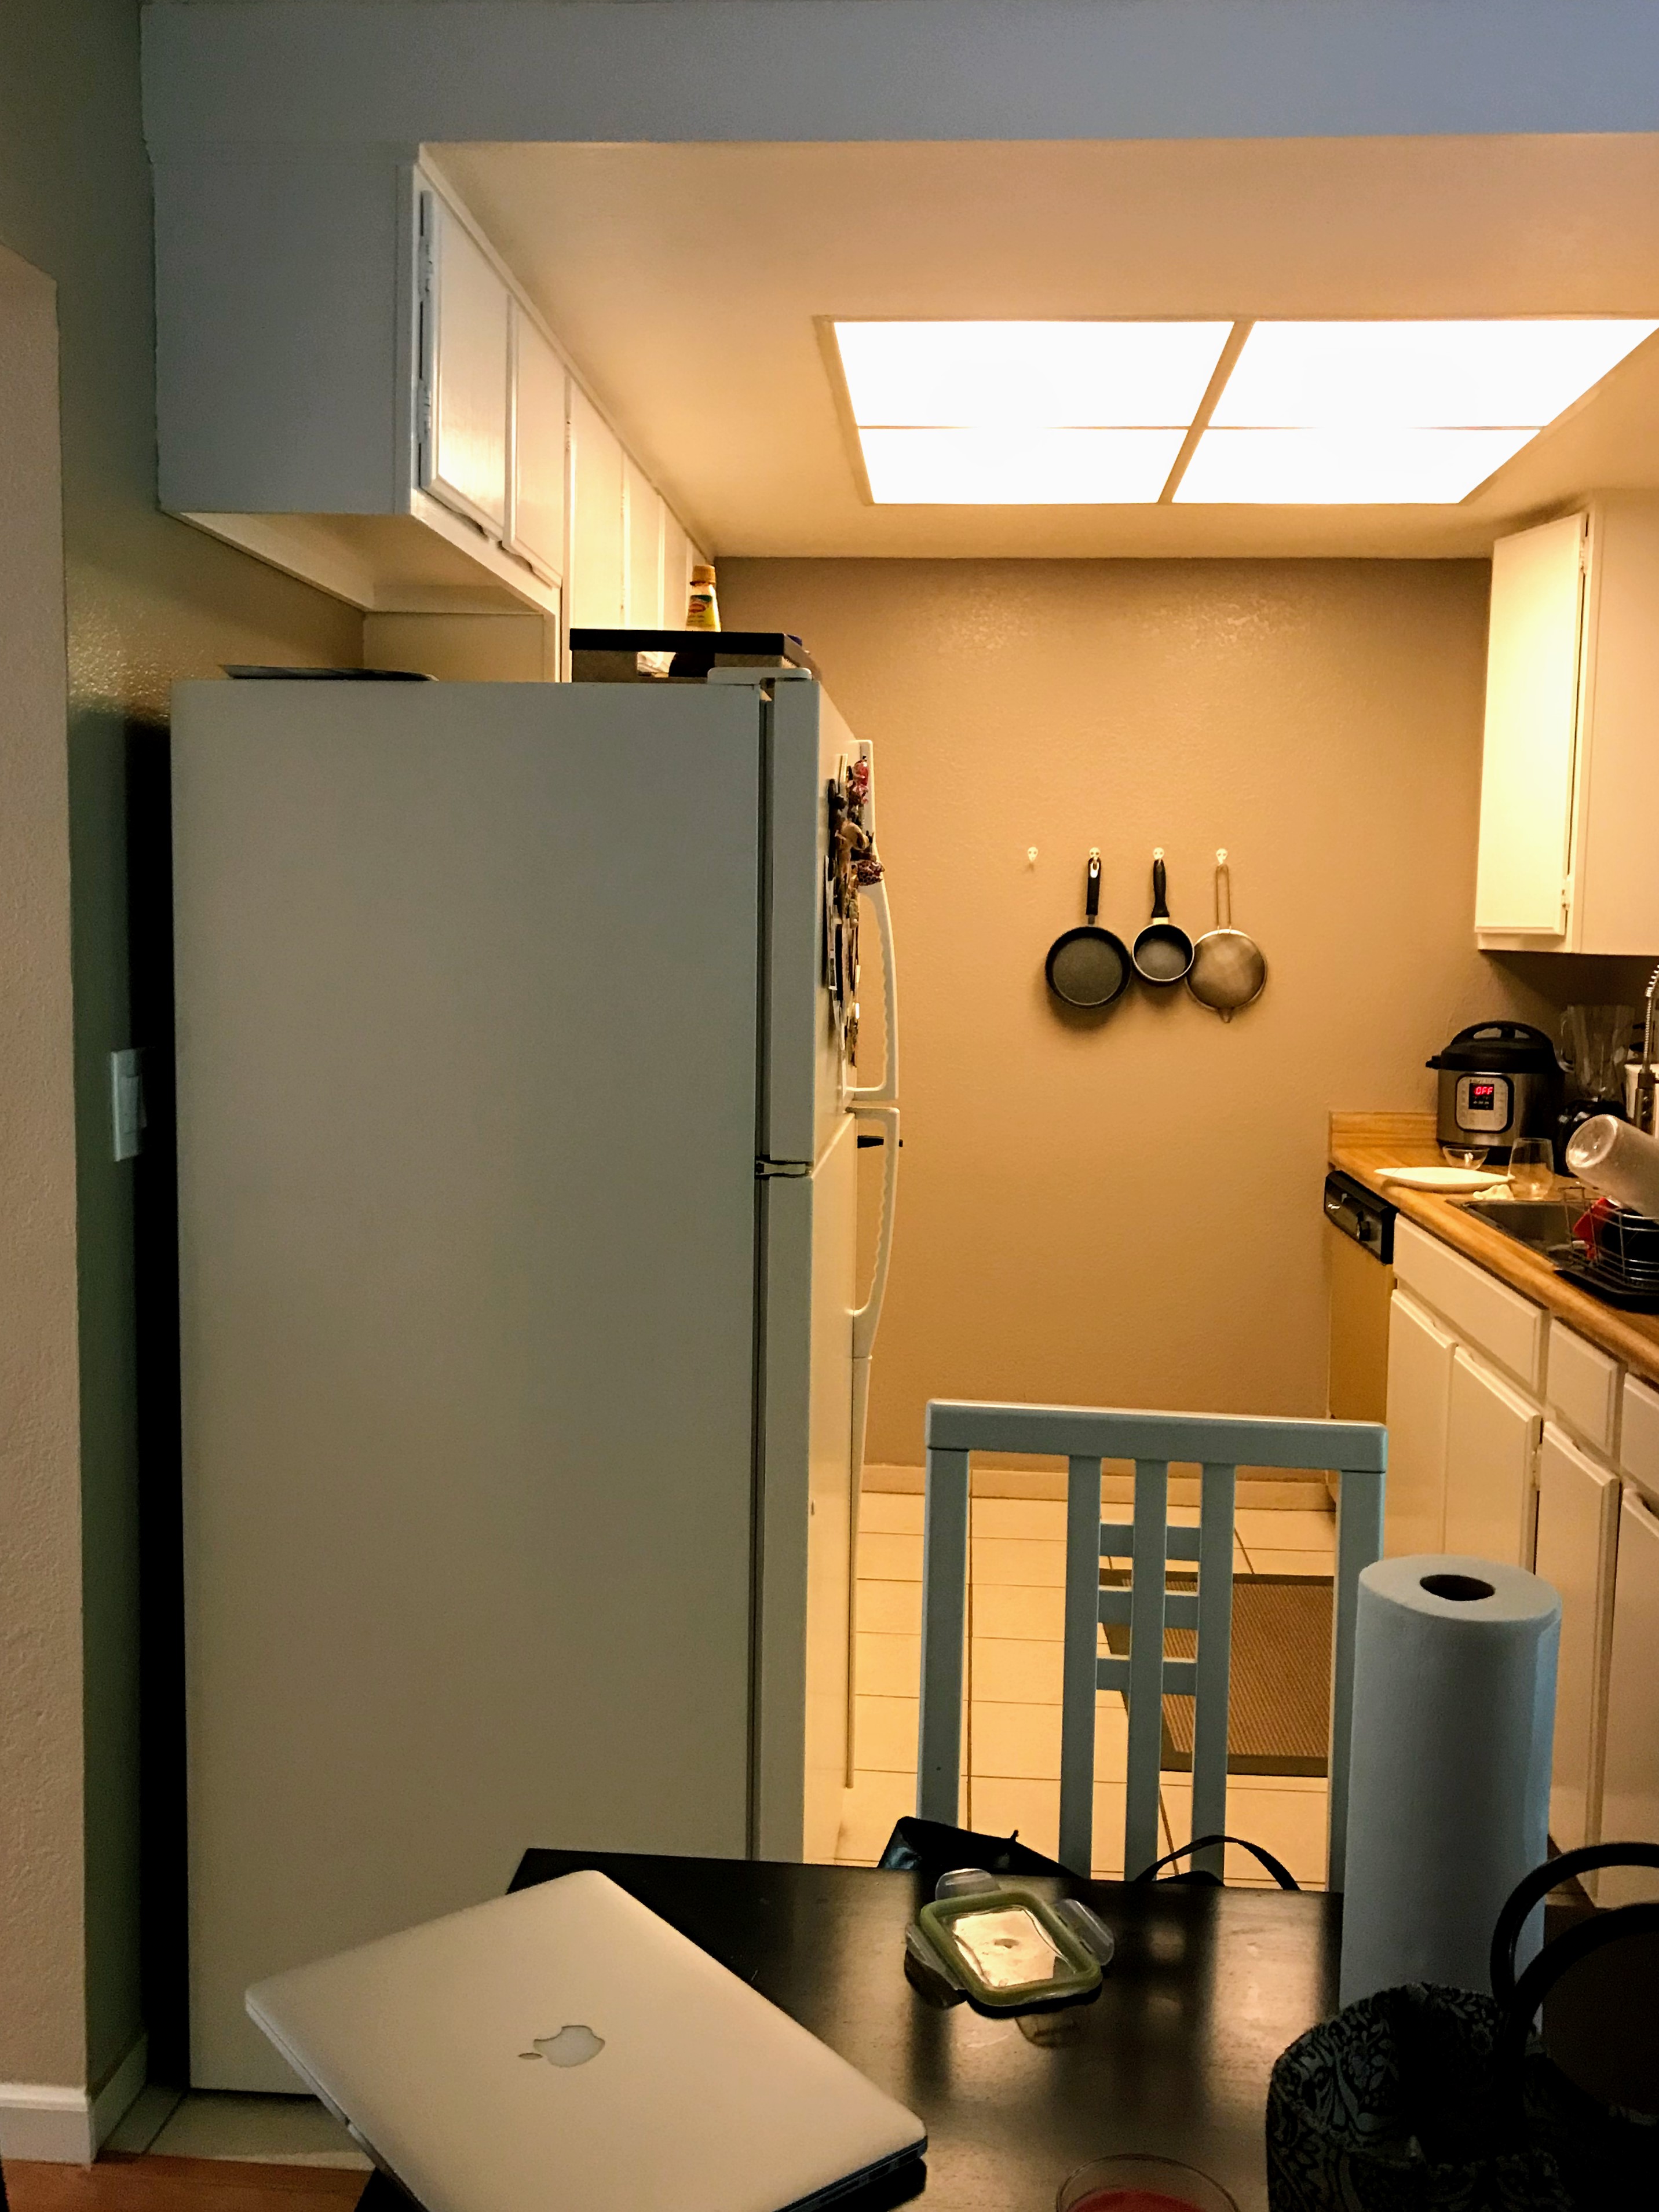
- The first thing you saw as you walked in was an old refrigerator blocking the light and hiding the entire kitchen behind it
- There were no upper storage cabinets above the sink.
.jpeg)
- There wasn’t much natural light to speak of but instead there was a dim fluorescent light fixture hidden inside a false ceiling which made the room appear shorter without adding any brightness.
- There wasn’t enough counter space for the microwave and various other items so the client ended up keeping a small cart to house these (see photo below)
- There wasn’t enough prep space on either side of the stove due to floor space taken up the by fridge
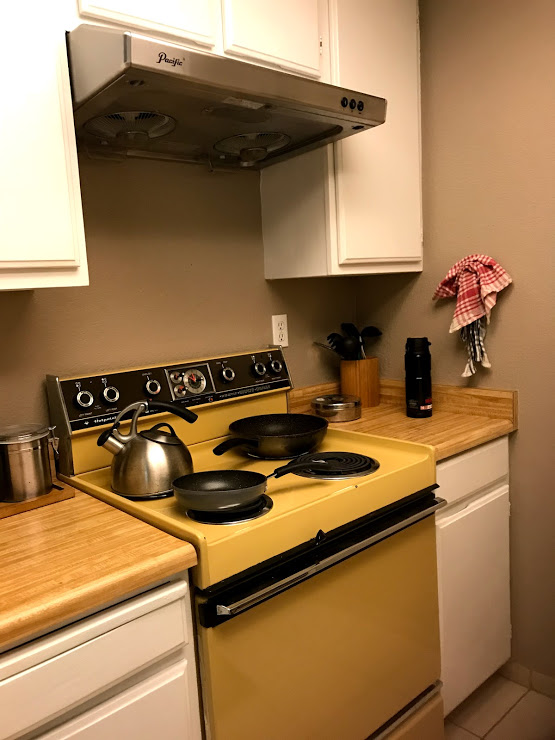
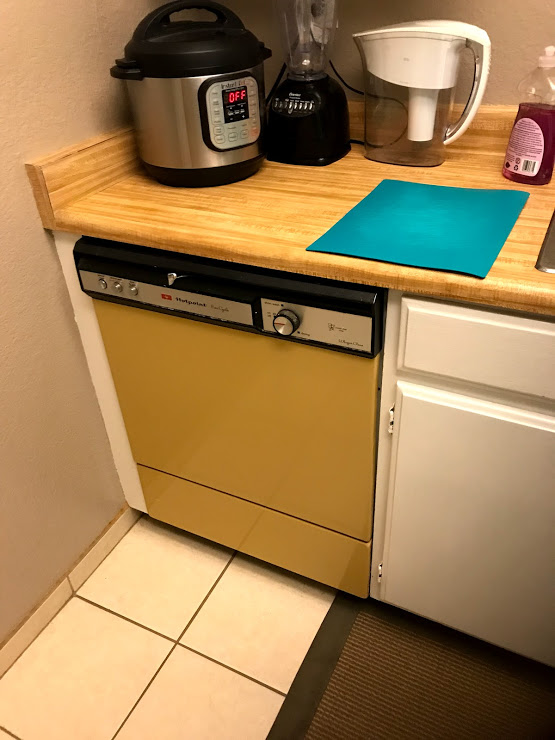
- All the appliances (fridge, dishwasher, stove) were functional (sort of!) but rather old and needed to be replaced
- The existing kitchen cabinets, drawers and countertops weren’t in a great shape and not functioning smoothly
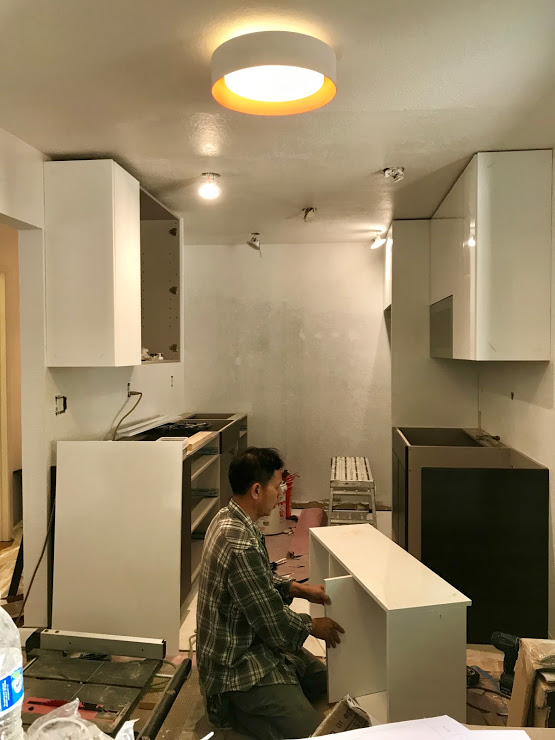
After reviewing the above with the client it was pretty clear we’d need to gut the entire kitchen out and start from scratch…so we quickly got down to business!
Here are some “In Progress” shots taken during construction to show what a difference it made just by ripping everything out:
New Layout/Final Kitchen Reveal!
Now let’s talk about the new design and how it solved the issues mentioned above.
- The new refrigerator is neatly tucked towards the back so it doesn't obstruct the flow/view from the living area
- We increased the overall storage by adding cabinets above the sink (achieved this by removing the old light fixture above the sink, also replaced the old faucet with a shorter version).
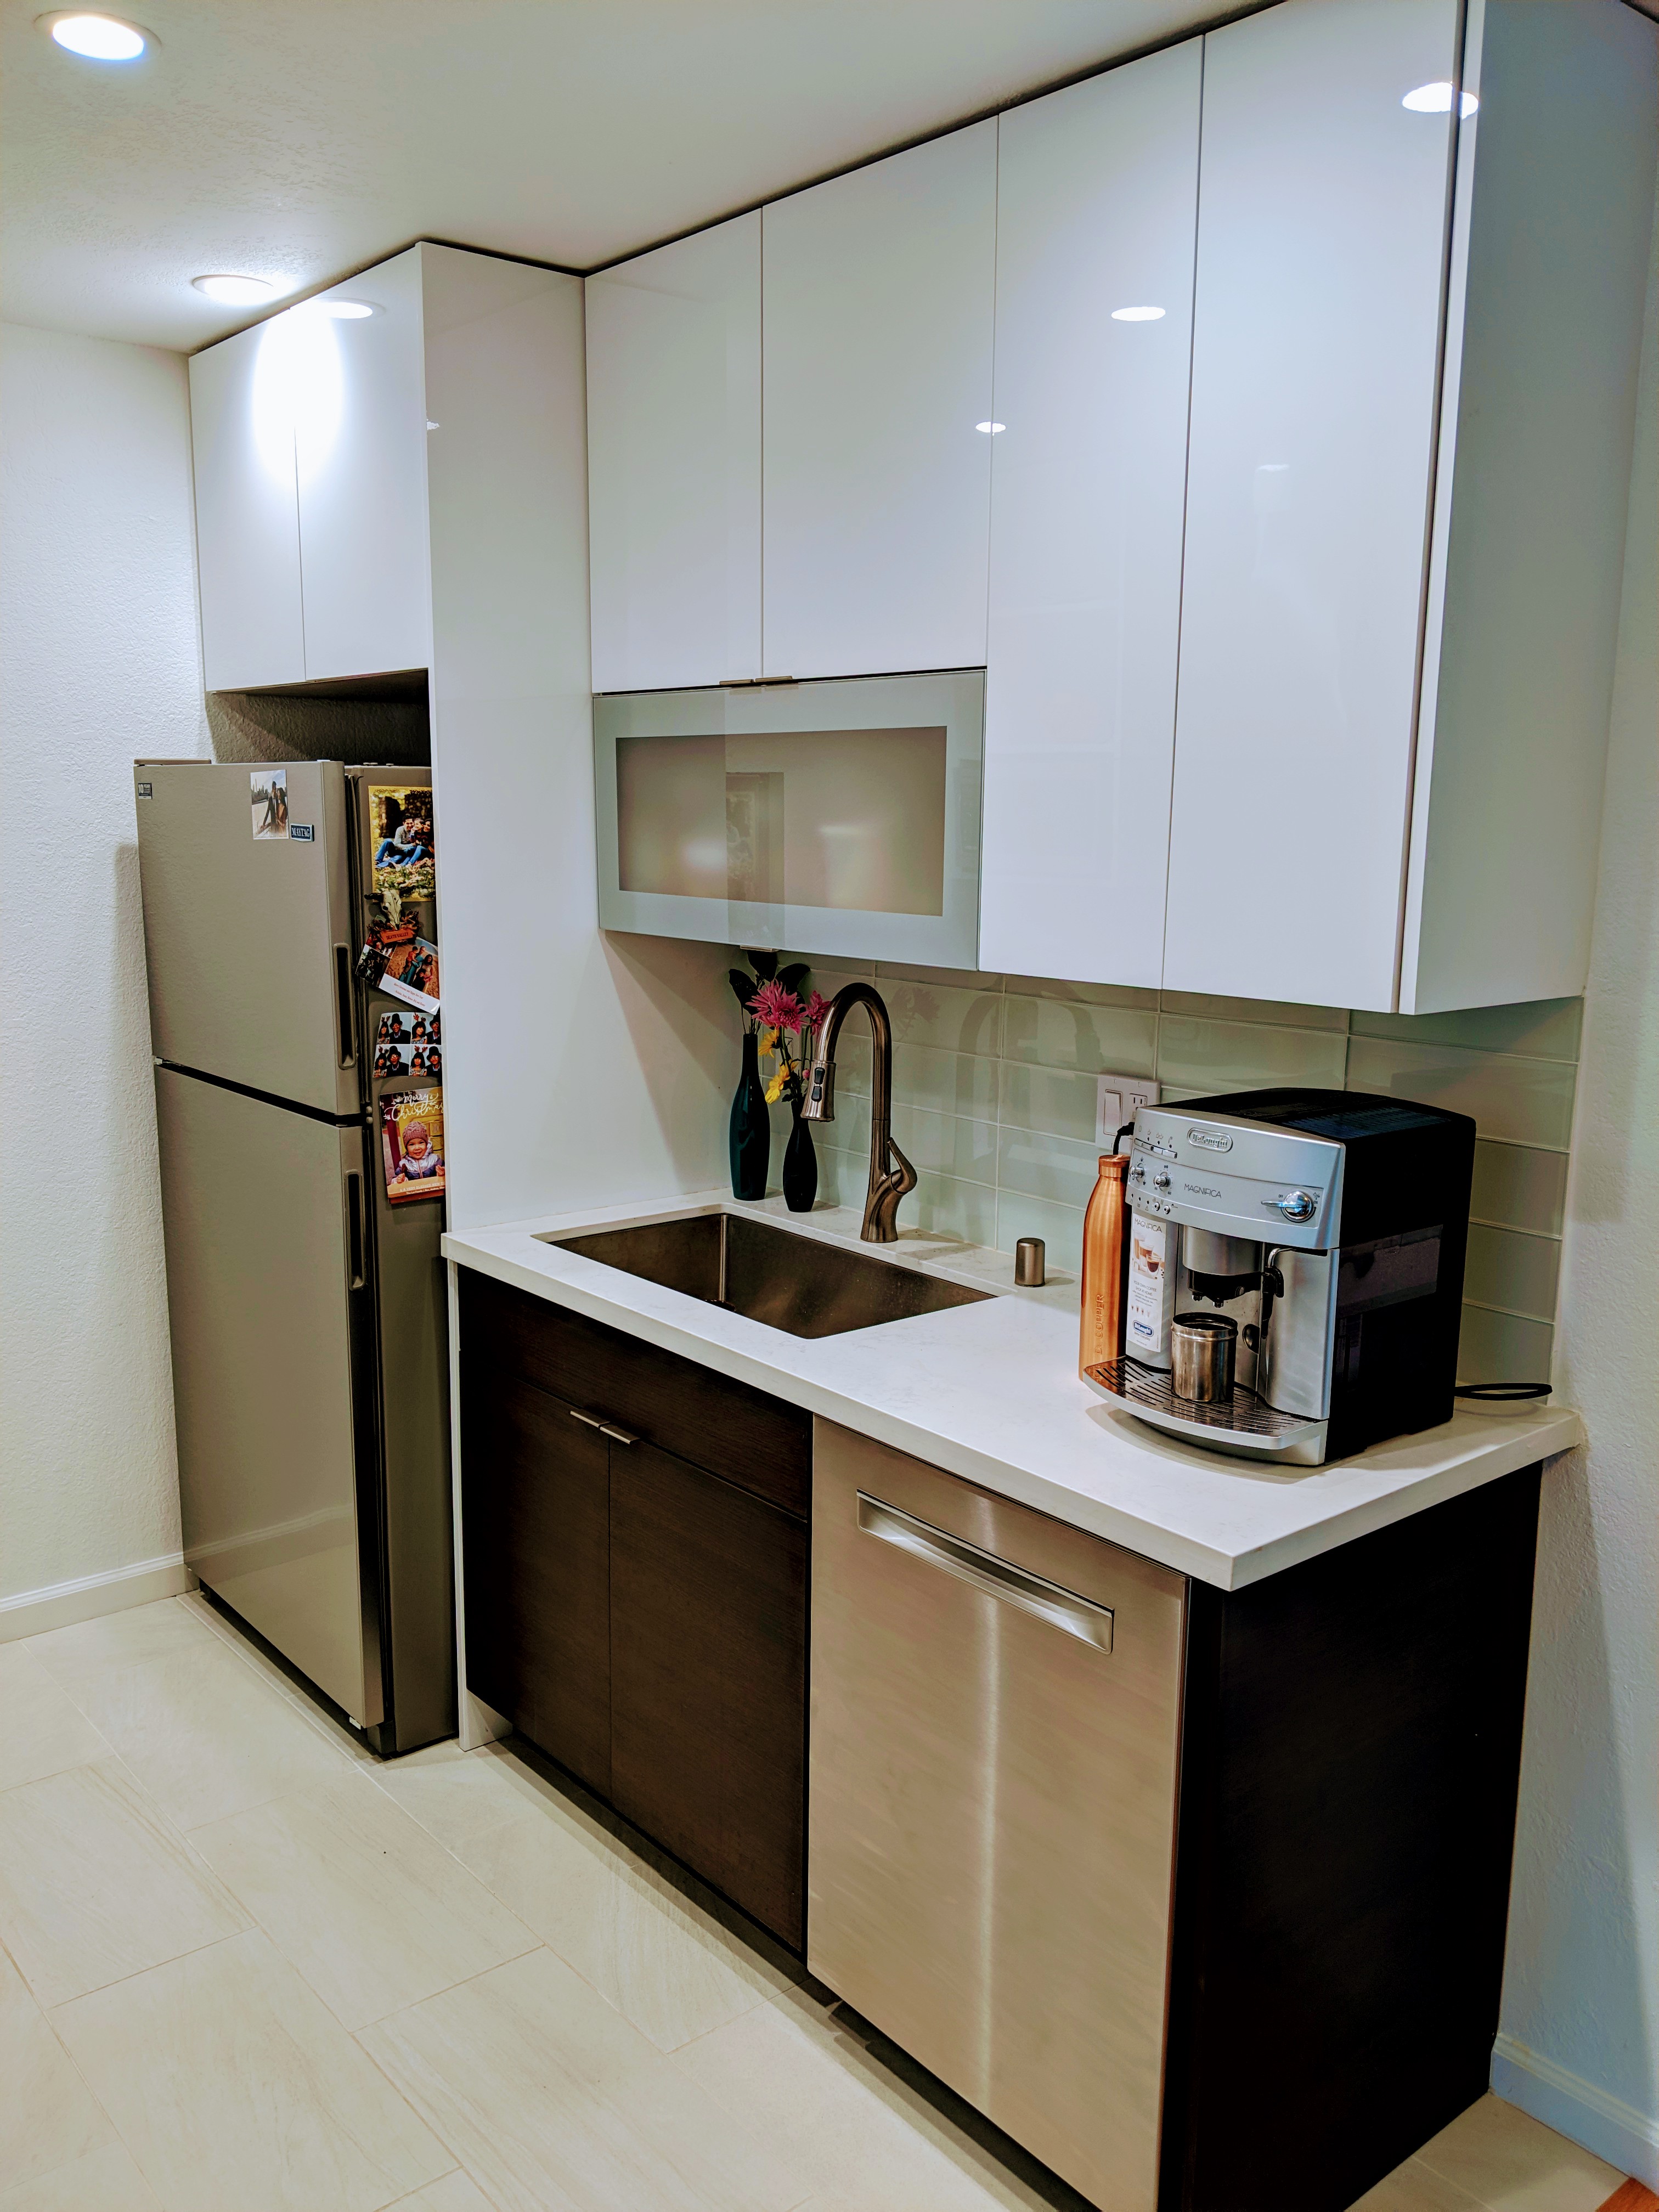
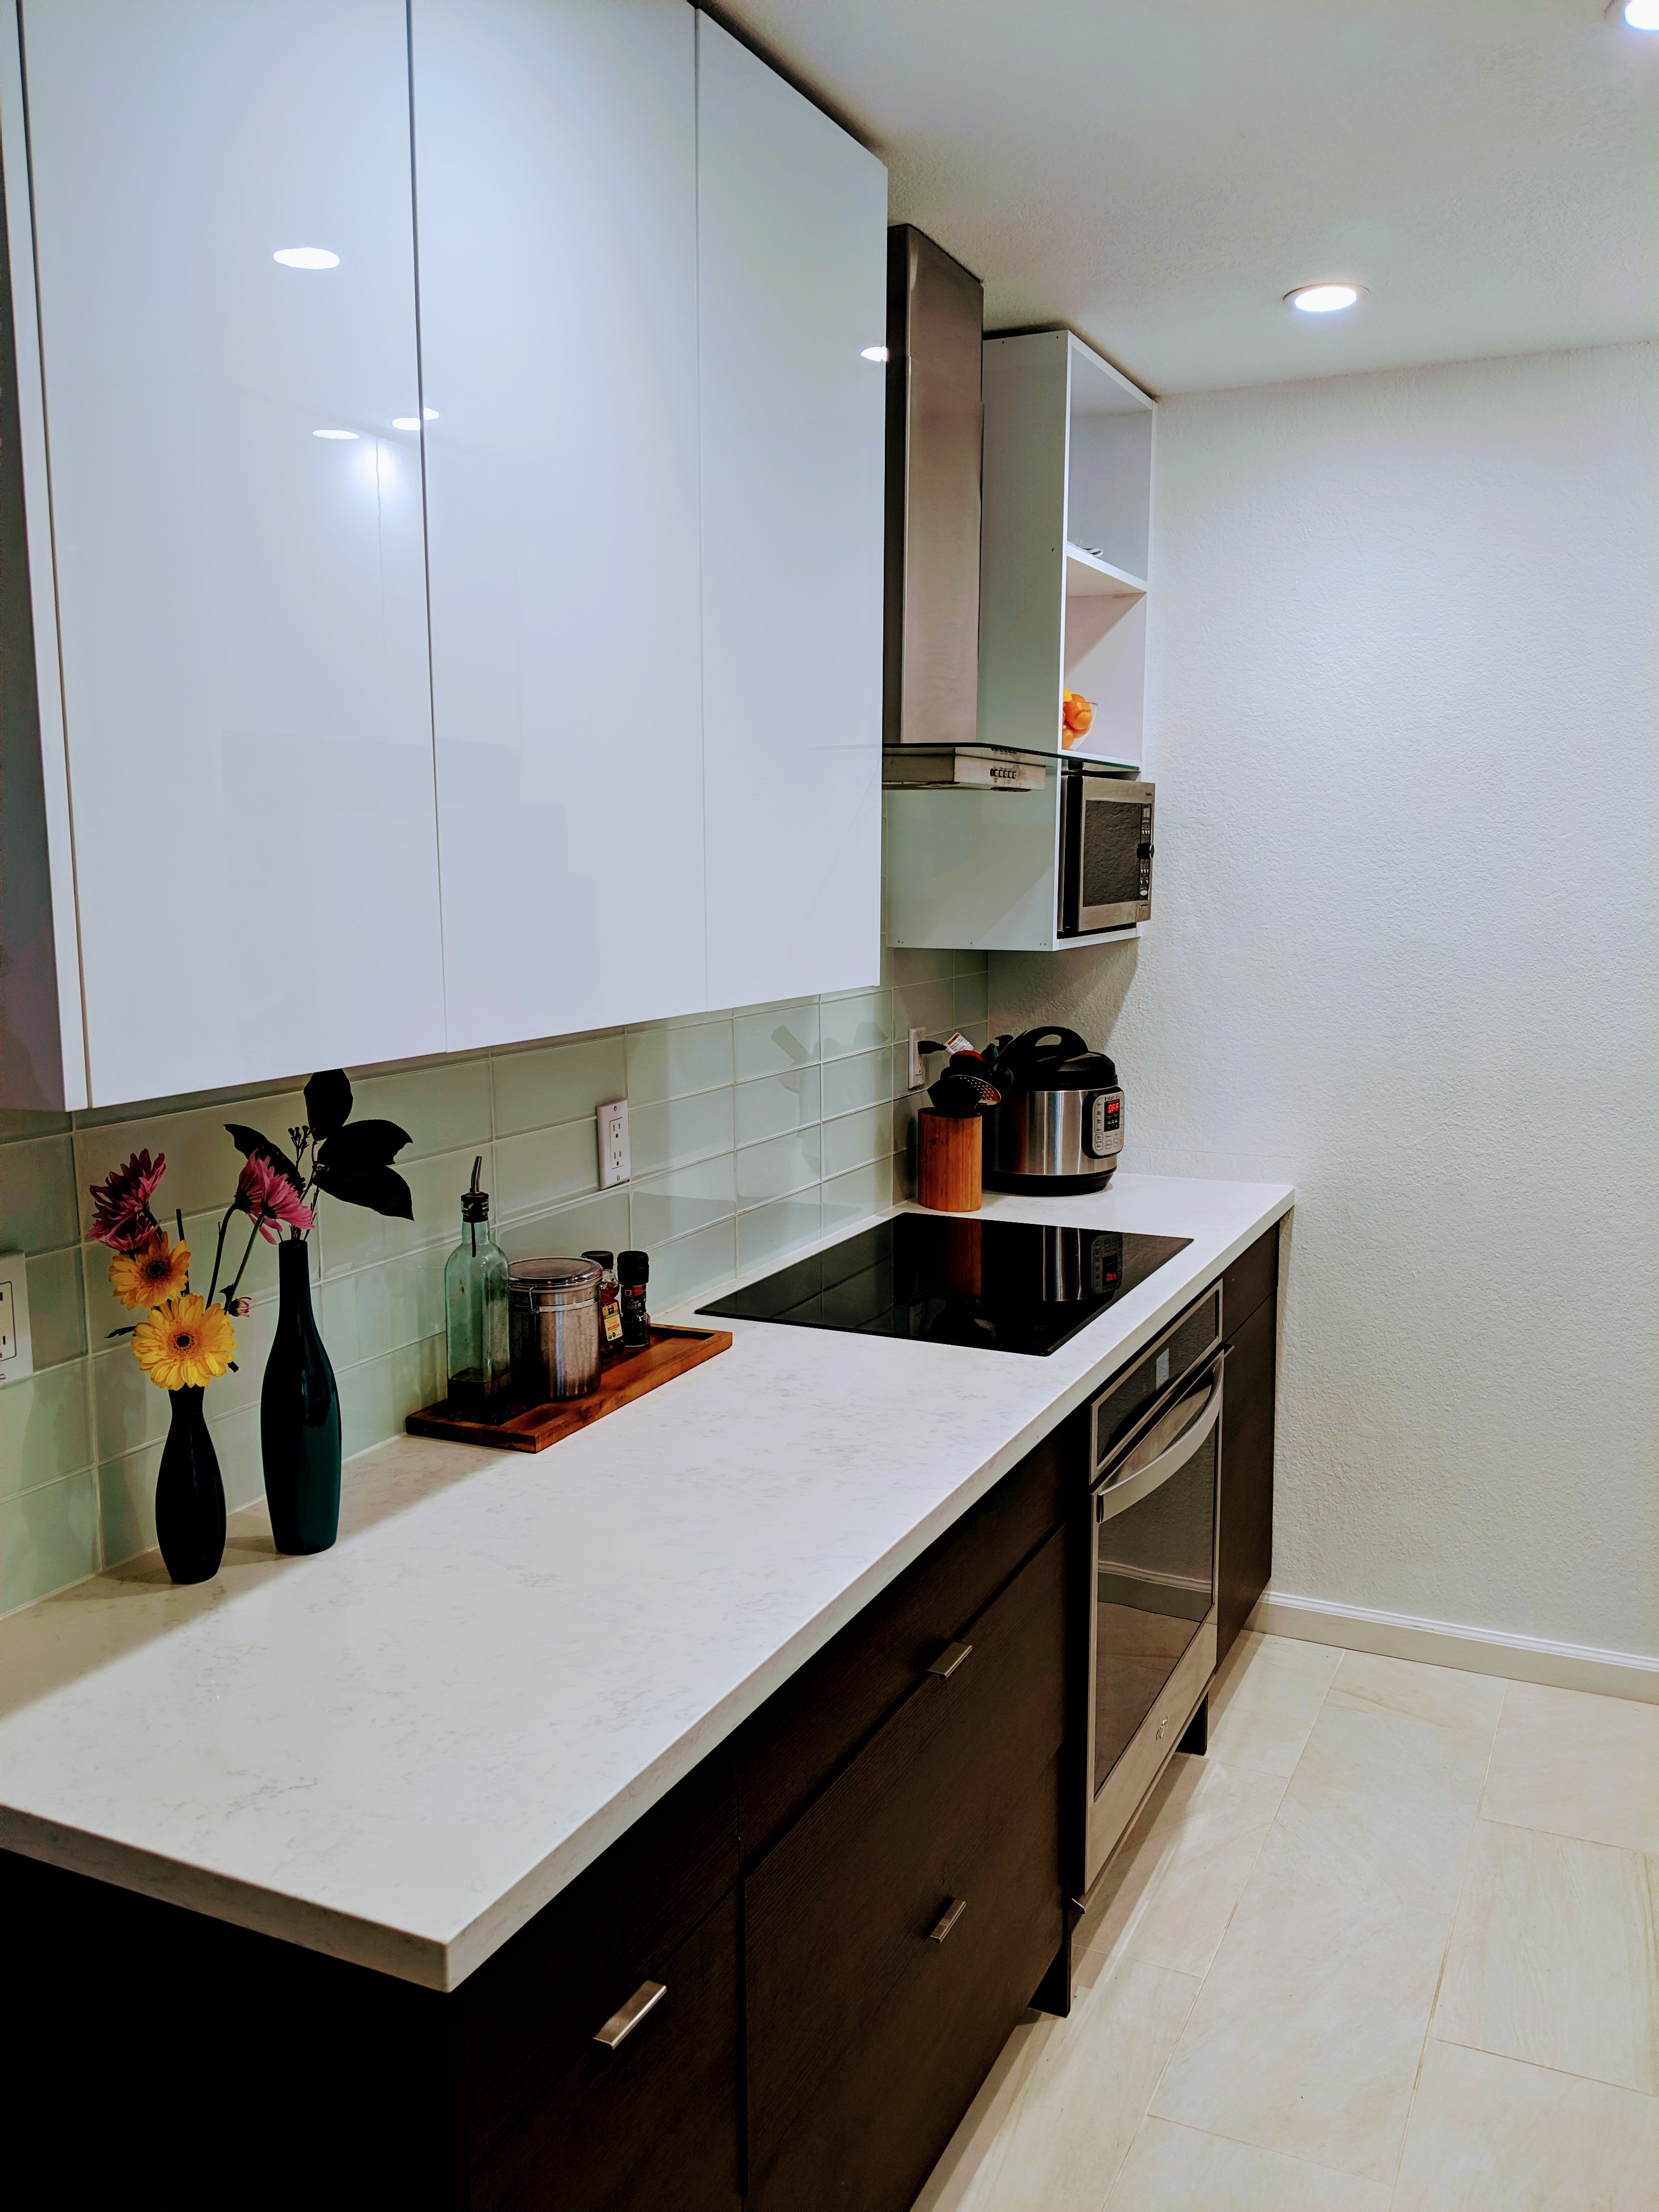
- The new cooktop is almost at the same spot as the old but moving the refrigerator out of the way created way more prep space for cooking on either side.
- Added a lift up glass storage cabinet above the sink to store cups/glasses and other frequently used items.

- We also added some open shelves to accommodate a smaller microwave, cookbooks, and any other display items the client might want to store (see photo above).
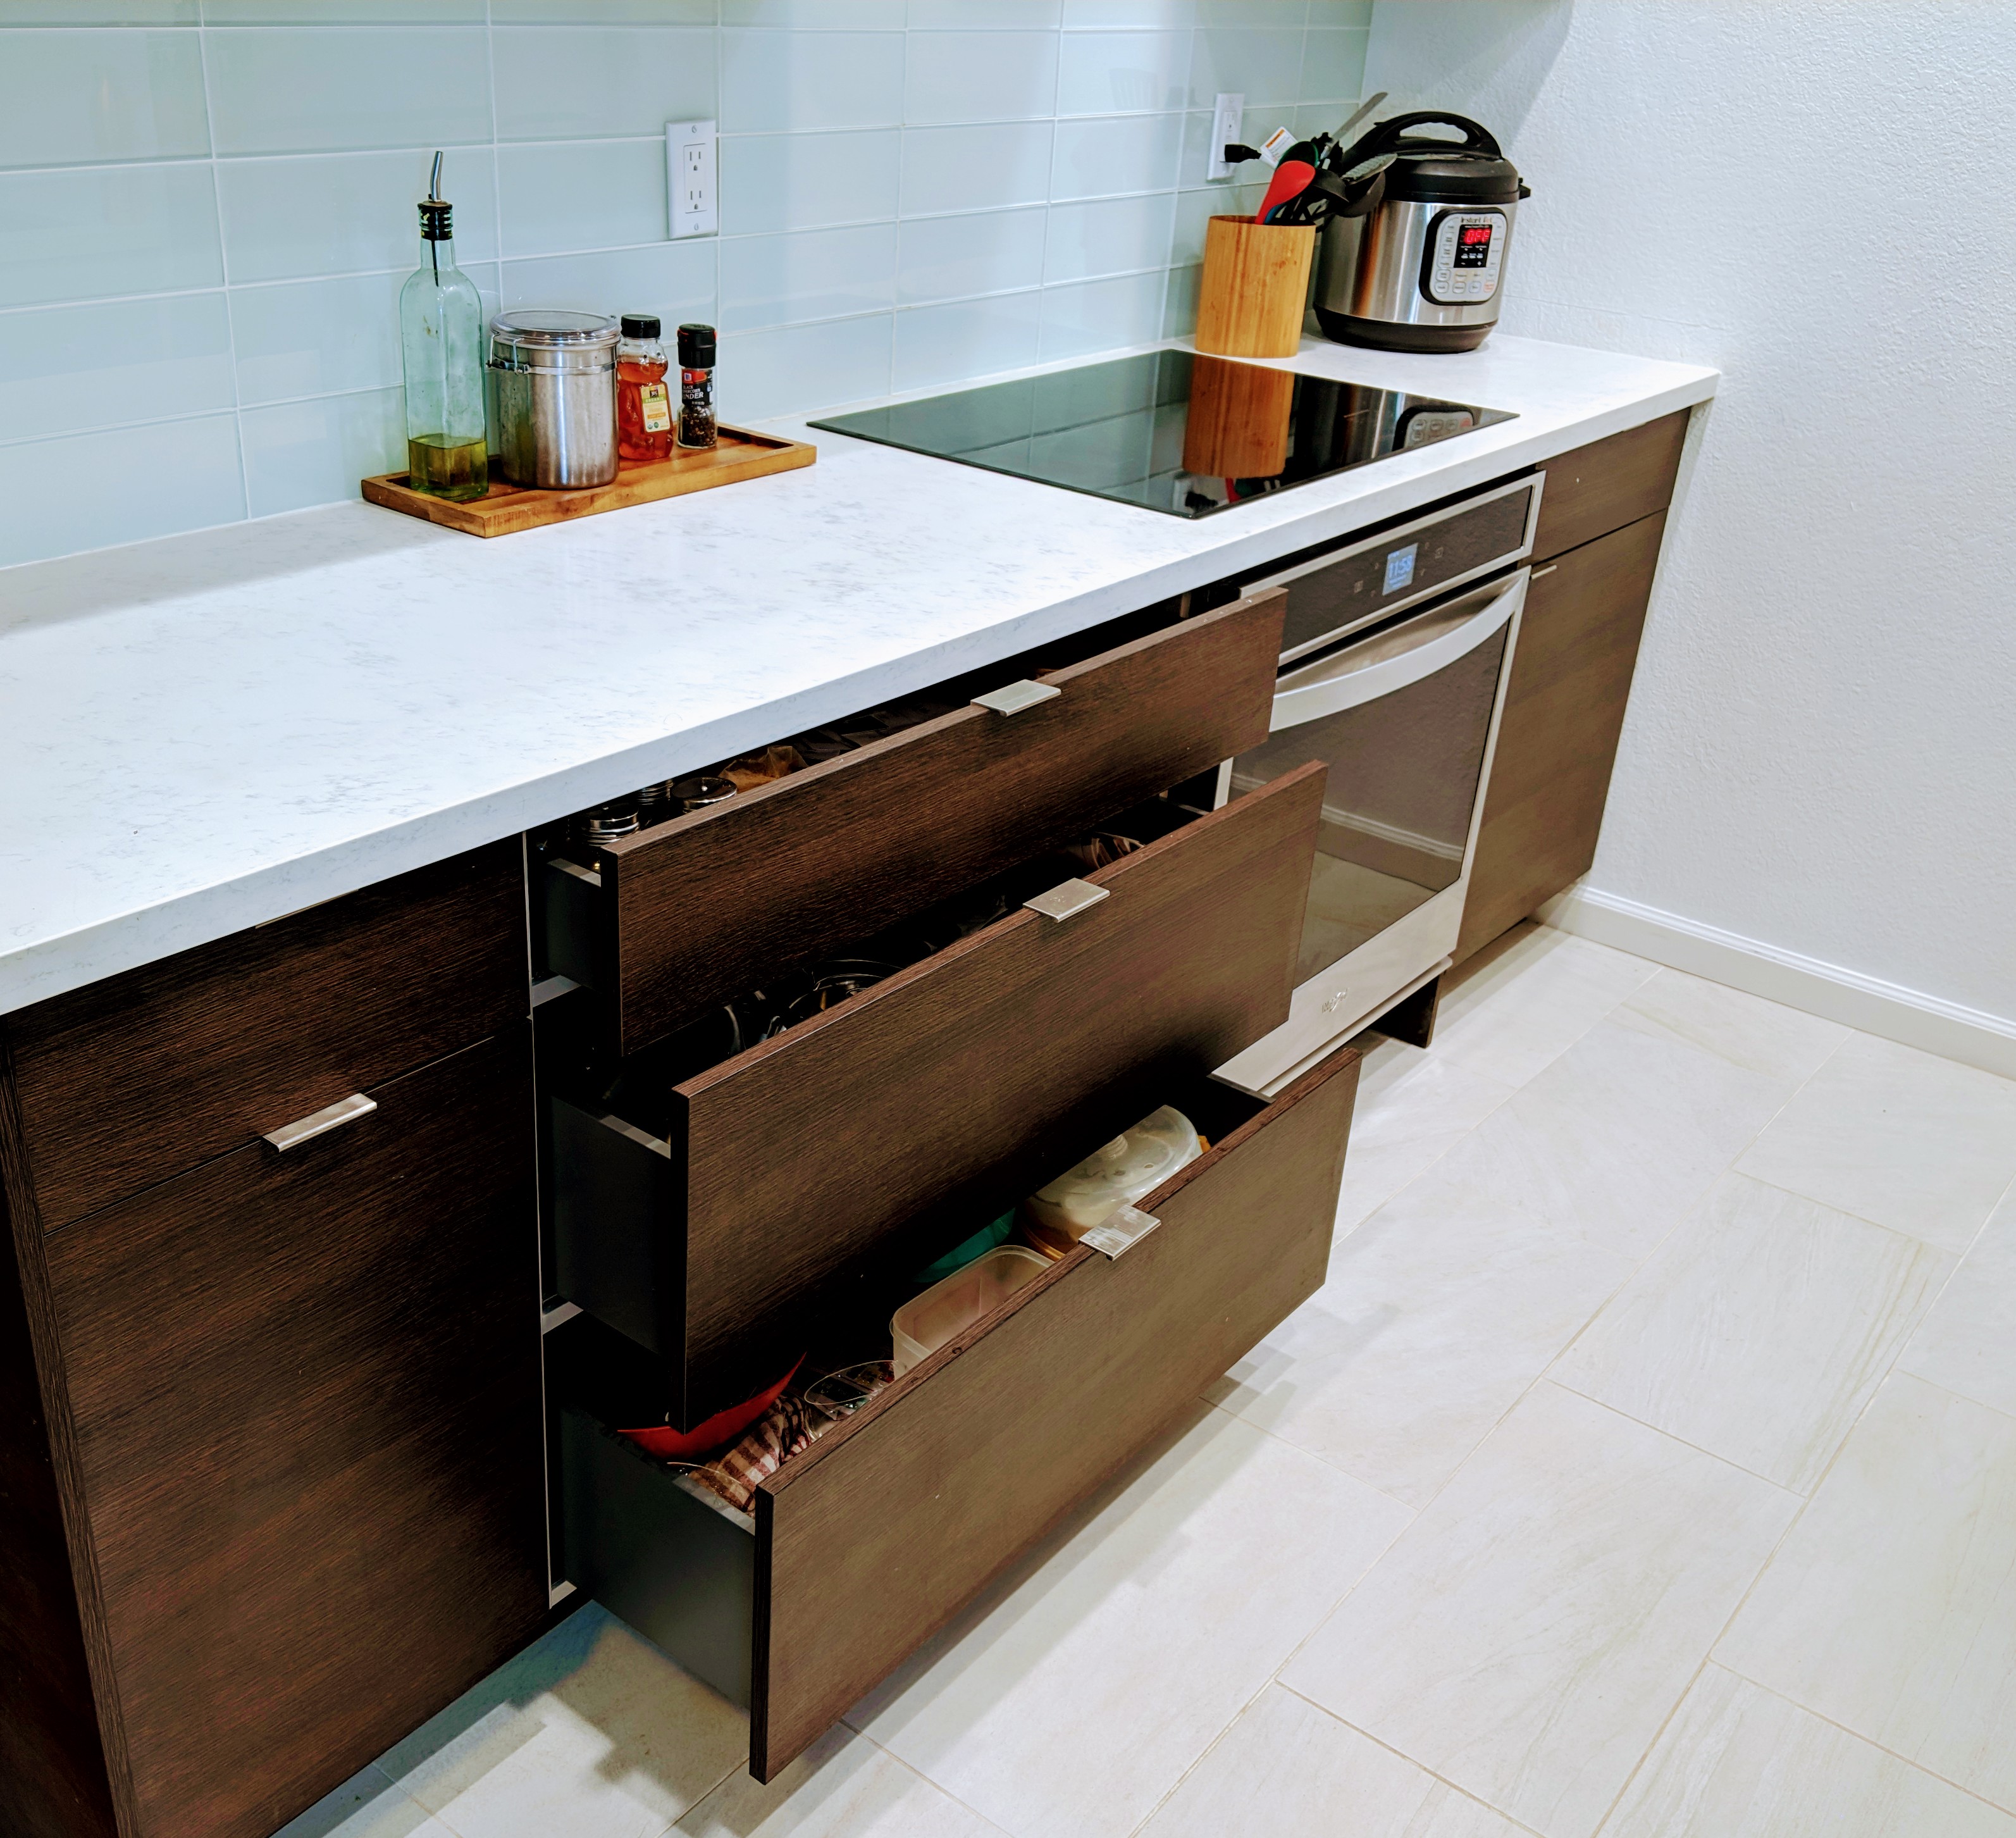
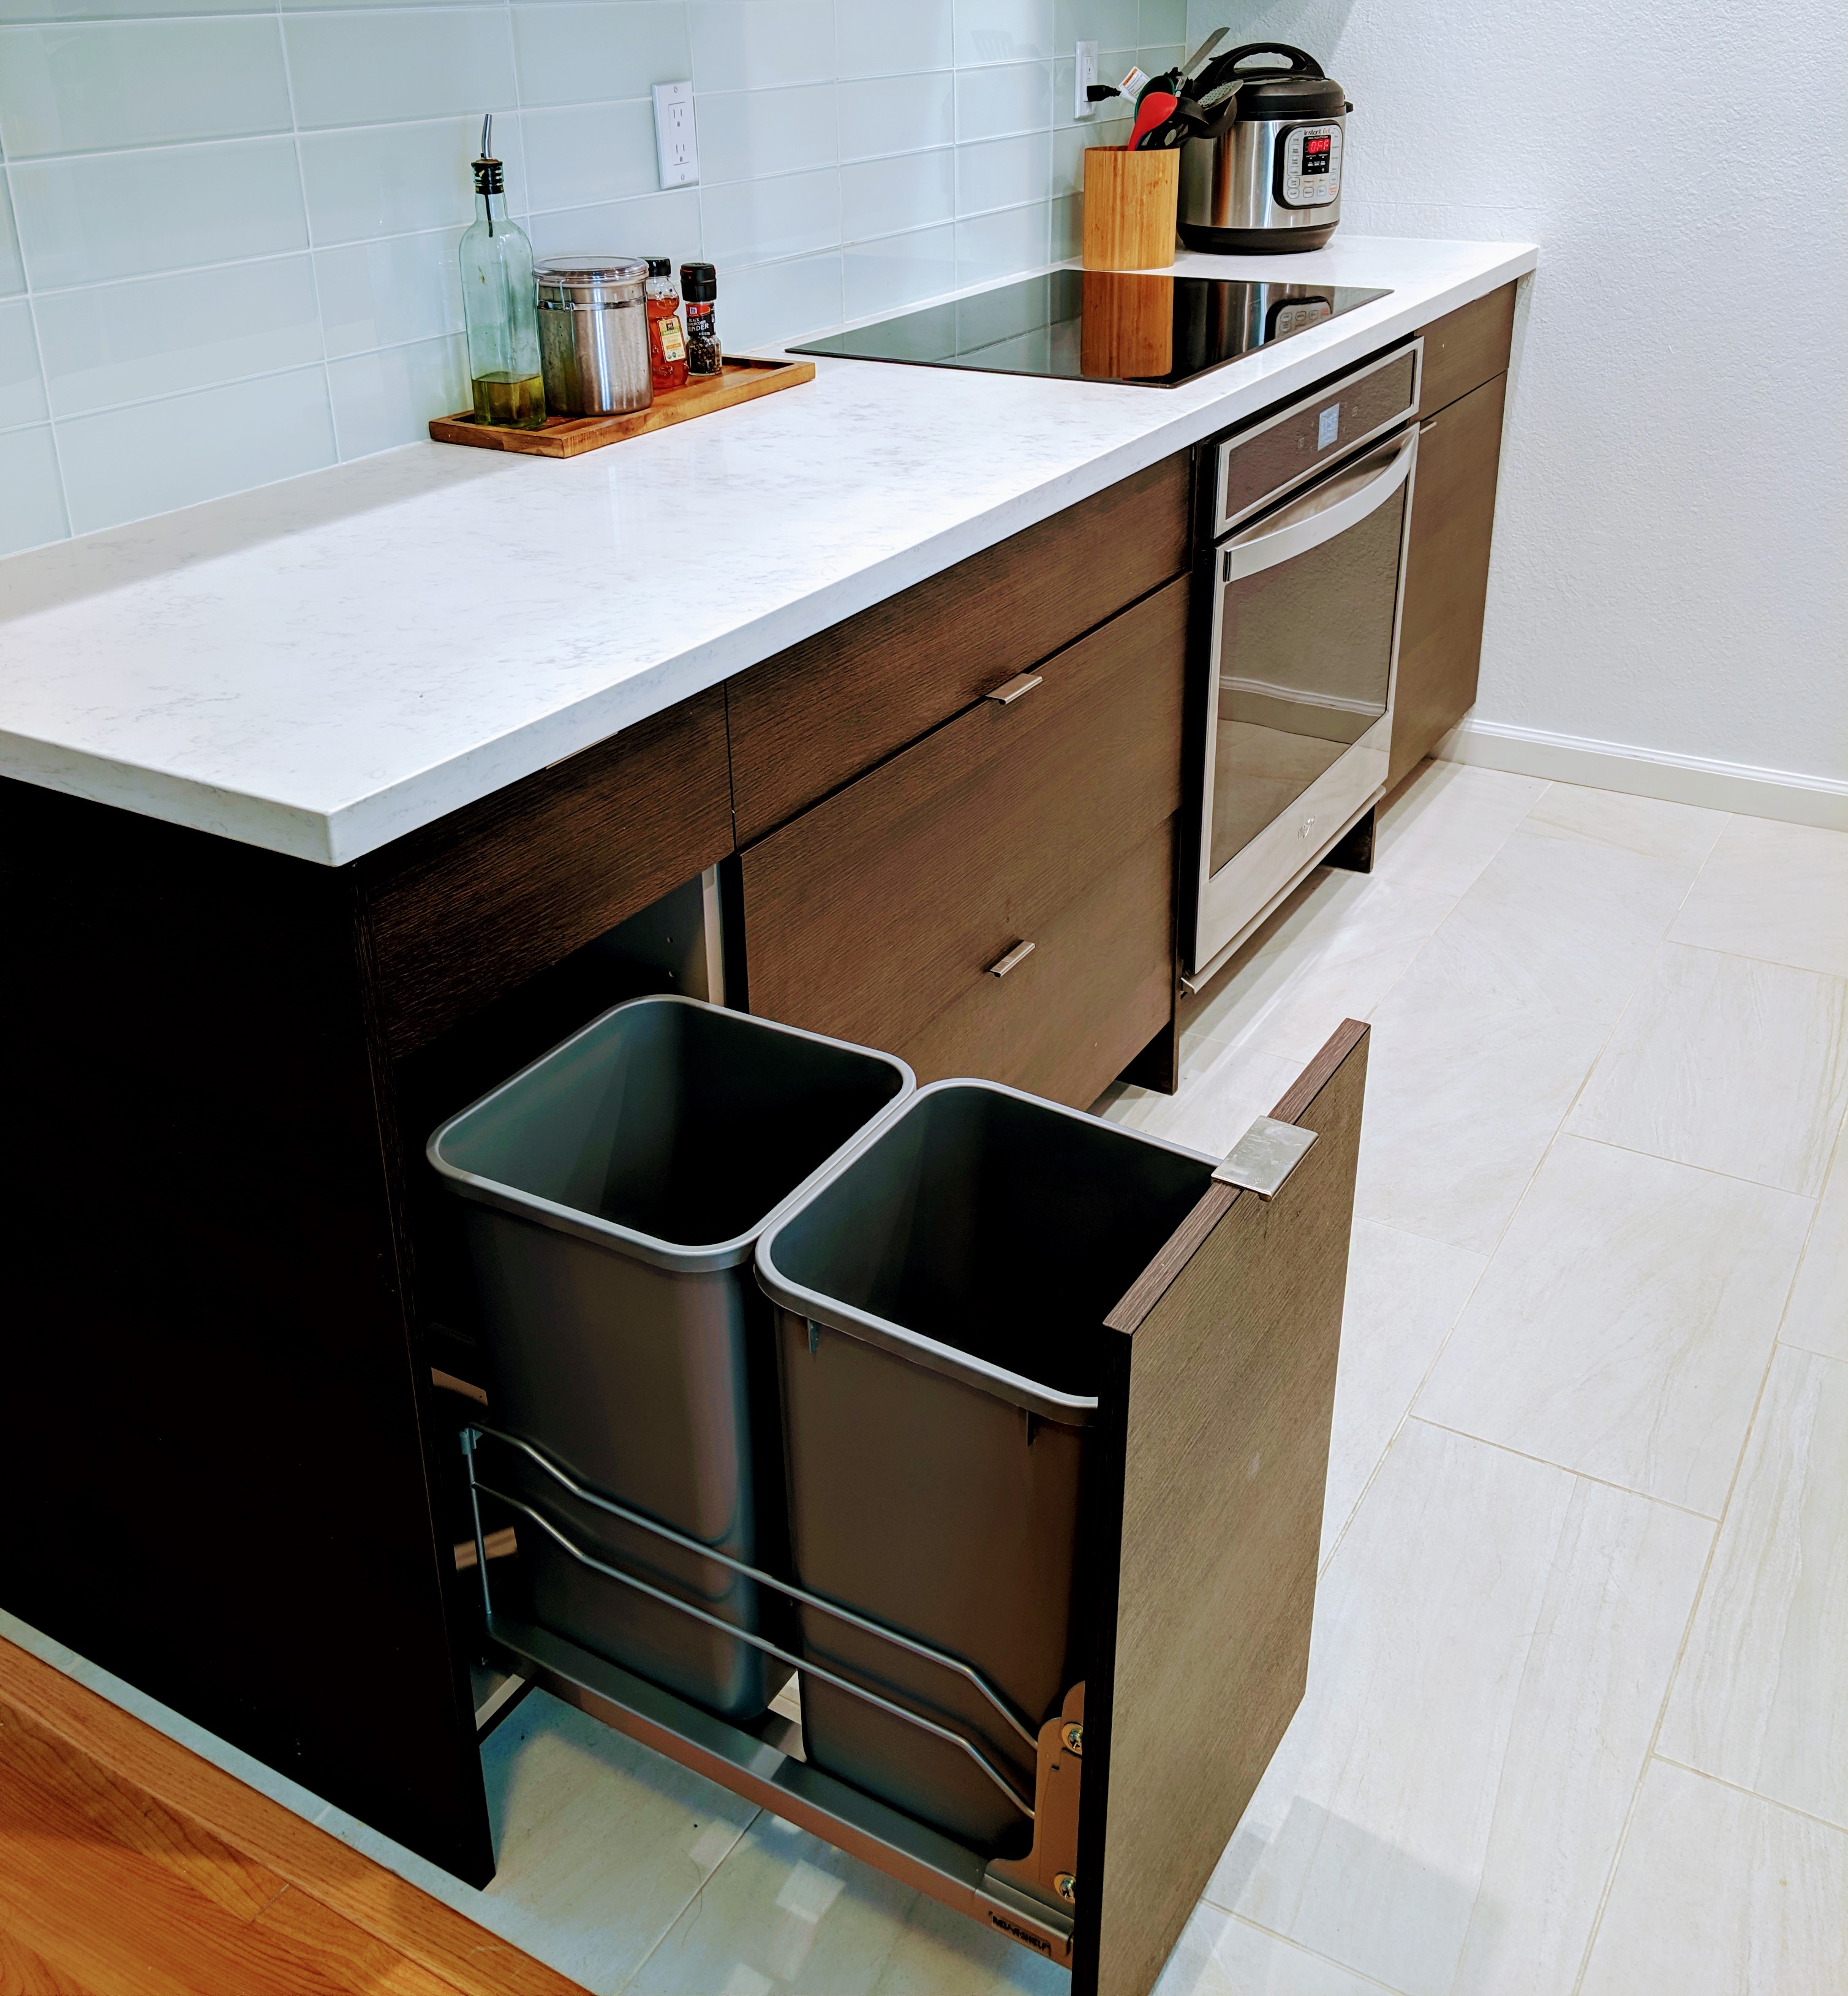
- Drawers of varying depths keep things organized and easy to reach! It's a great way to store cutlery as well as pots and pans of varying sizes.
- We increased vertical height visually and gained more storage space by removing the false ceiling/fluorescent light fixture. The new recessed light fixtures not only look so much cleaner but make the space far brighter!
Note how the two-toned cabinets created a more customized look than using the same color for lower and upper cabinets
The client chose a drop-in induction cooktop with a separate oven below and it turned out amazing! Yes it’s slightly more costly to buy two separate appliances compared to a stove/oven combo but this is a one time cost and a sleeker solution. If you’re interested in learning more about induction cooktops, check out this article.
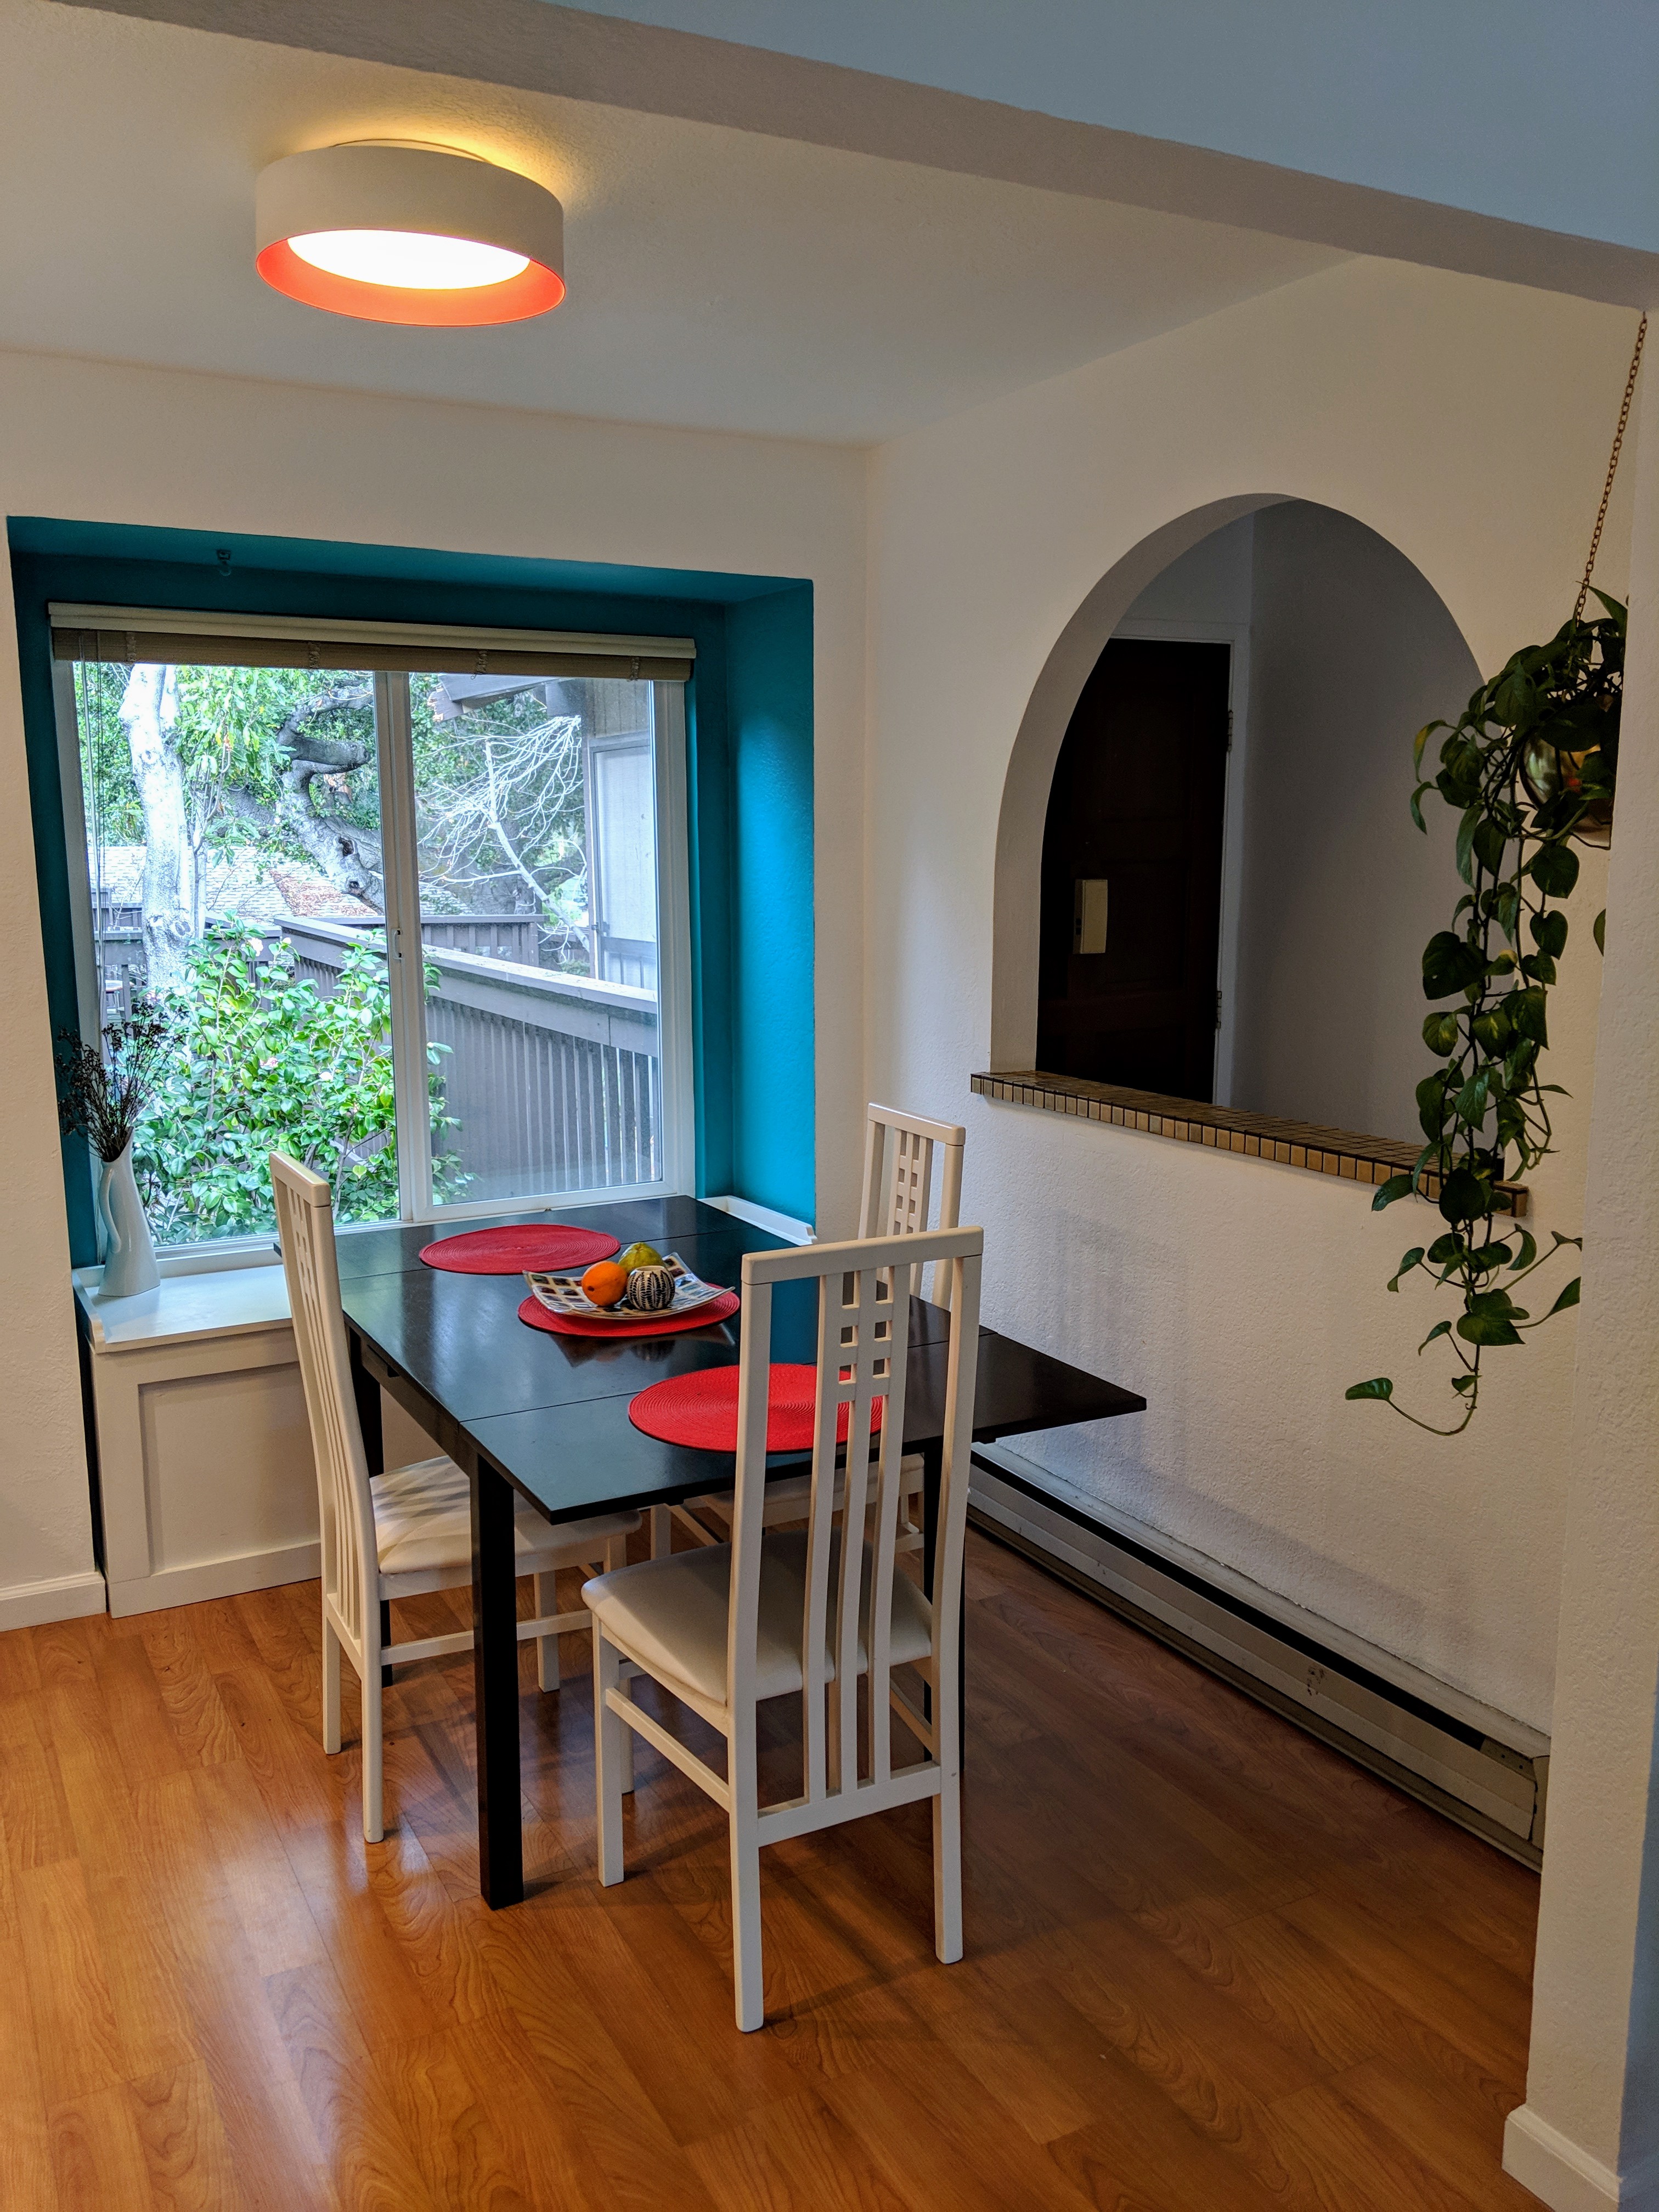
We also made minor improvements to the dining area by painting the little niche on the side in an accent color and adding a custom storage bench below the window (built by a carpenter specifically for this project). The bench will help add more seating around the dining table. In future the client plans to buy a new set of dining table and chairs as well as update the old blinds at the window.
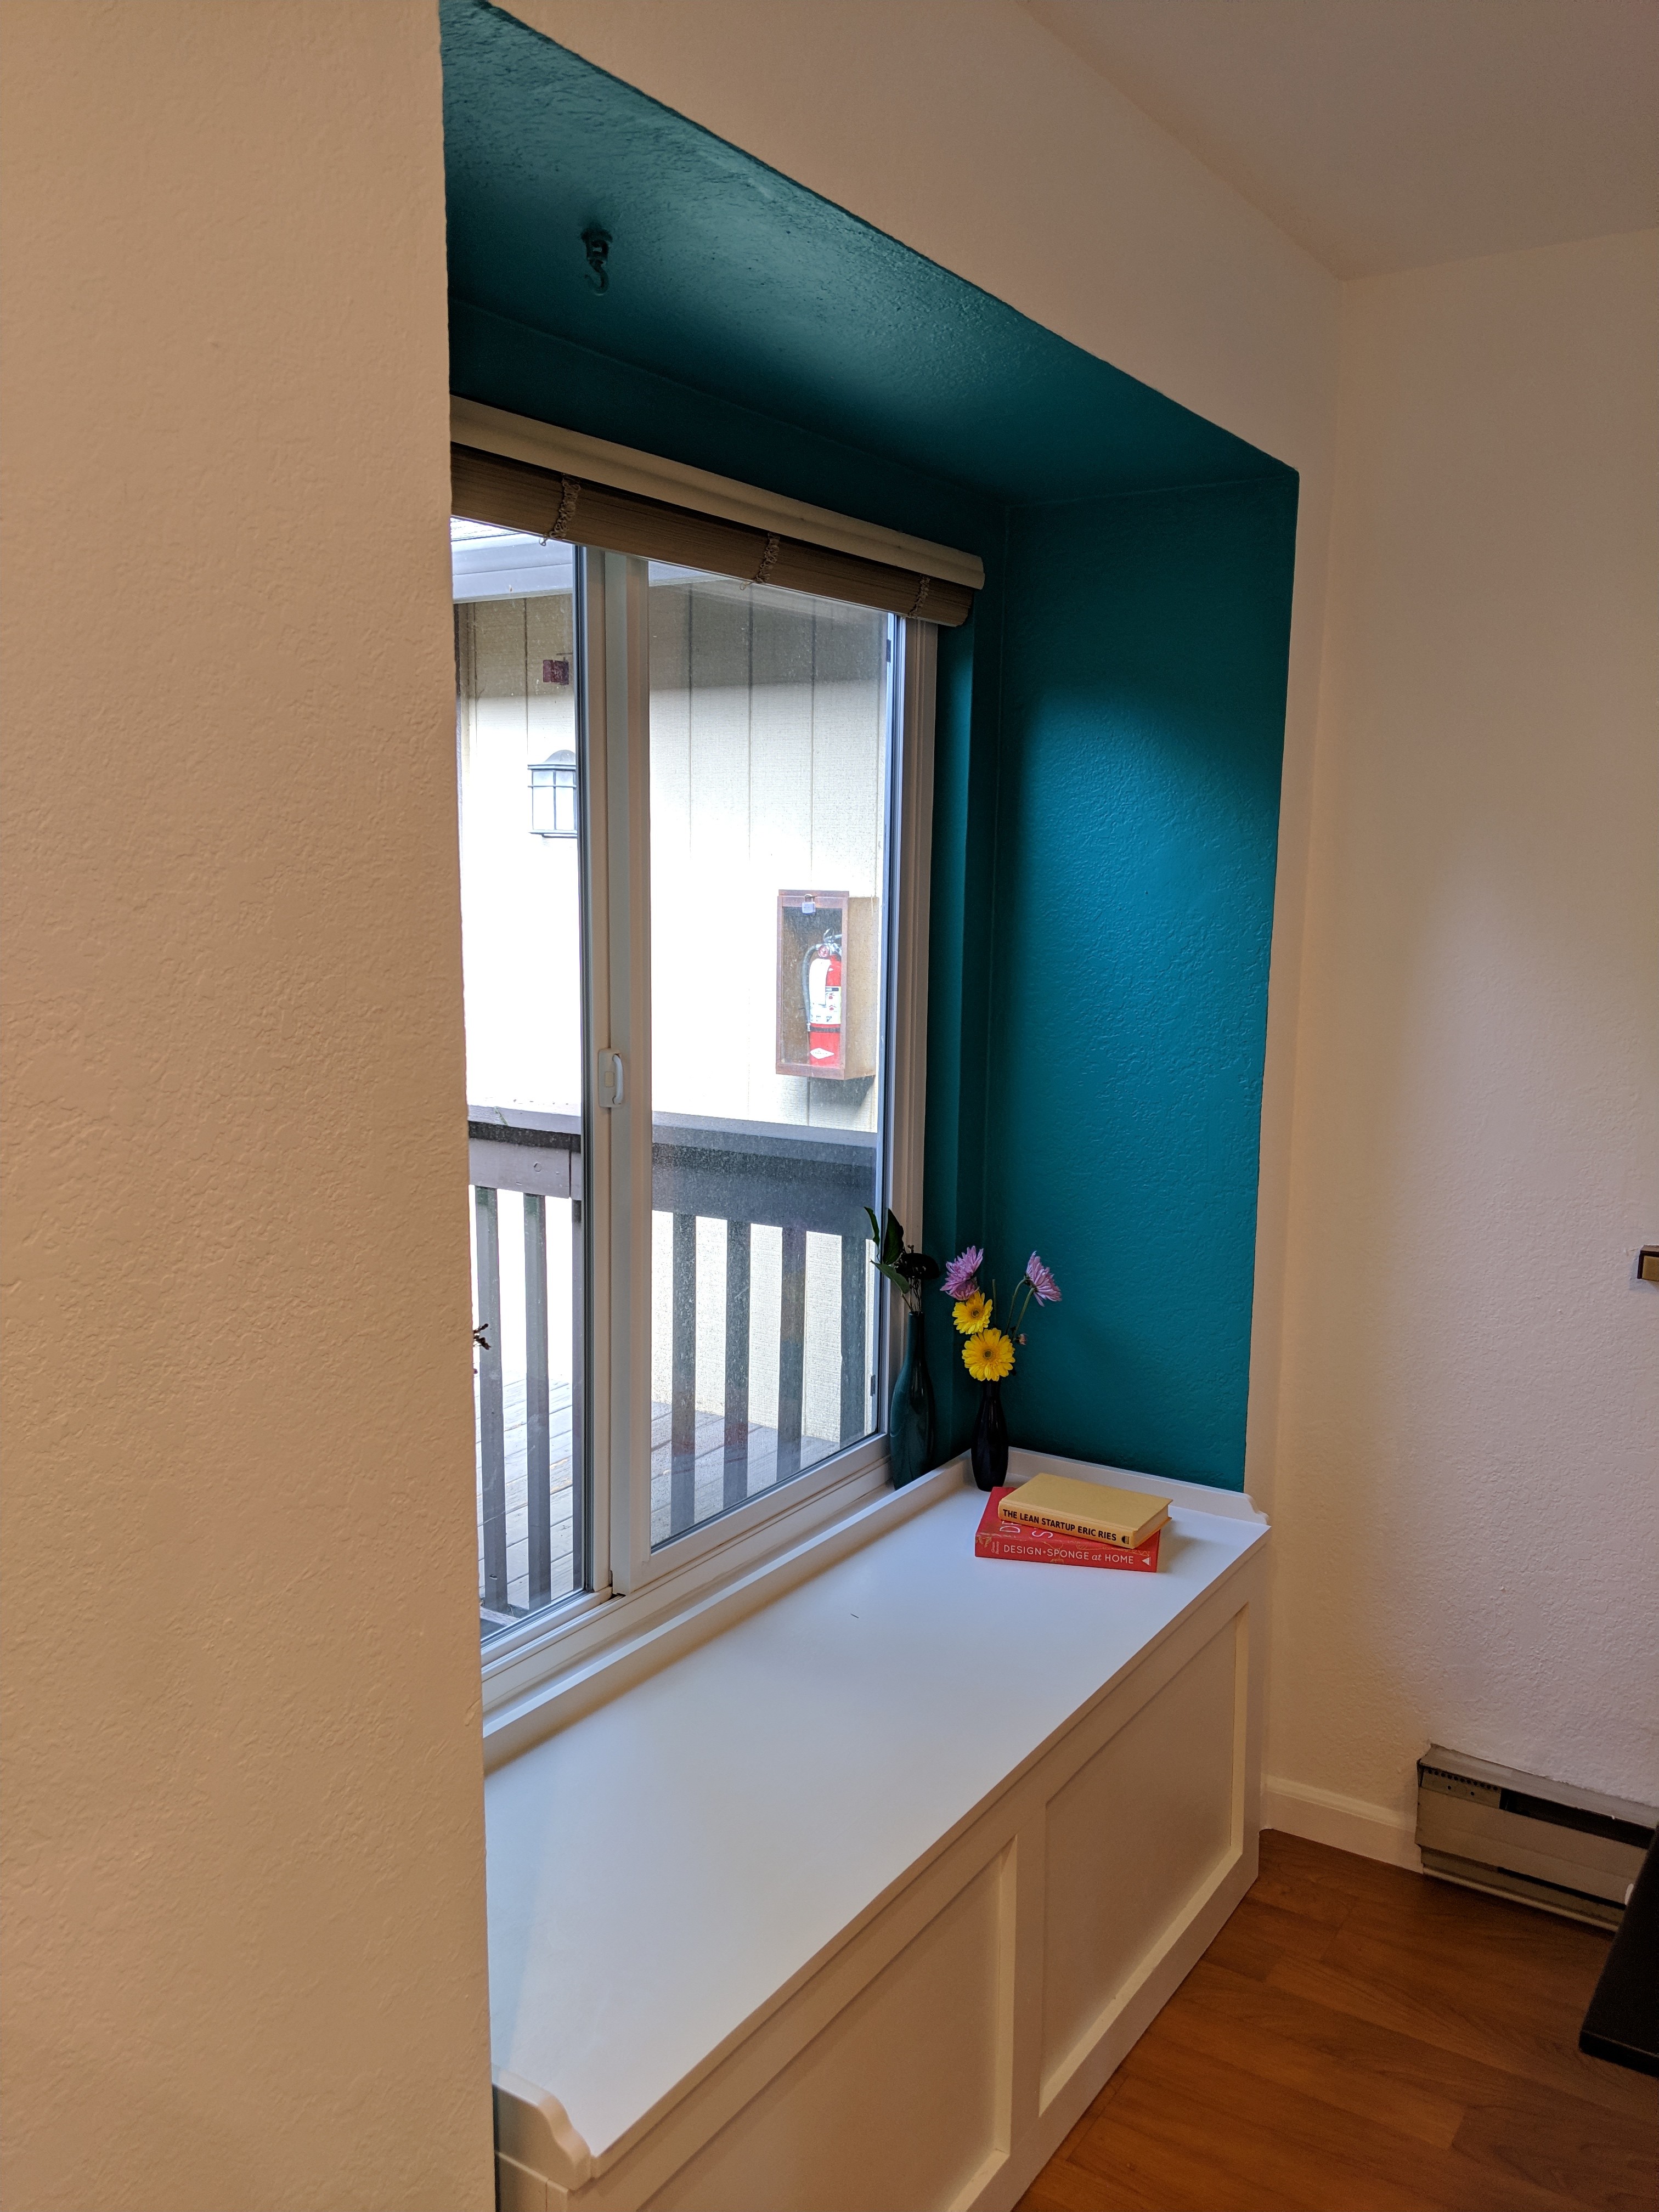
Painting the window niche in an accent paint created a focal point when looking into the dining from the living room
Finishes
Once we were satisfied with the overall layout of the space on paper, it was time to shop for cabinets, appliances and other finishes for the space. We knew we had to be budget conscious in our selections since we had to factor in the cost of paying the contractor as well. See the boards below for all the paints/finishes & appliances picked for this kitchen (links are in the caption).

BEHR White Paint | BEHR Turquoise Paint | Backsplash Tile | Cabinets & Edge Pull | Floor Tile| Countertop (What we selected is out of stock, here’s something similar)
Appliances
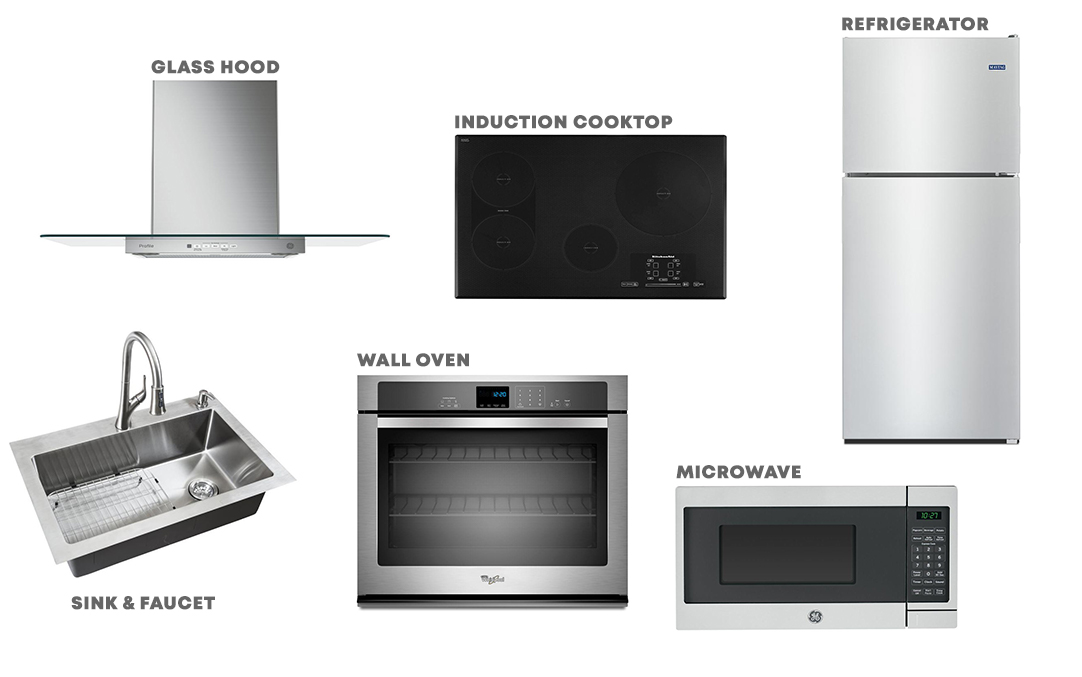
Glass Hood | Induction Cooktop | Refrigerator | Sink/Faucet/Dispenser | Wall Oven | Microwave
Contractor Interviews/Selection
I know from experience that choosing the wrong contractor can cause a lot of headache, not to mention it can be a costly mistake! So before I end this post I wanted to briefly talk about the contractor/construction part of the project. In this case, I helped the client find, interview and get estimates from 6 contractors before we settled on one that matched our needs and budget. It took us a few weeks to go through this process.
There was a lot of variation in $$ between all 6 and this made it tricky! We could have just gone with the cheapest one but we went through each estimate line by line to make sure we were comparing fairly and spoke to each to clarify anything we didn’t understand. We were happy with our choice in the end.
That’s it folks! I really hope these two posts have been helpful in learning how a small renovation project works end to end. As with any renovation, there were mistakes made and as a designer I always feel like I could have improved certain things. Would you guys be interested in a future post discussing the lessons learned and what I could have done differently? Let me know in the comments below!
.png)
.png)